What’s the use case ?
You’ve just made a dope machine learning model that you need to train and unfortunately you don’t have the needed resources to do your computation, so the first idea you may have is heading to an existing cloud solutions like GCP, which will give you “cheap” computation power…but…how can we use it with ease and elegance to train and gather our model, do some predictions and get the results as a sweet csv, excel or whatever ? I know that most data scientists are a bit afraid of the big fluffy monster named “Cloud”, so I will show you how to proceed and make this operation as straightforward as possible.
The general idea ?
The graph bellow describe summarily how we will proceed and what are the main pillars to achieve what we want.

- Index 1 : A Docker image based on Ubuntu, to which we’ll add the needed dependencies to make Python work with all the necessary requirements. The main script for doing the learning and communicating with our cloud storage bucket we’ll be contained inside this image. After creating the image locally we’ll push it to the Google Container Registry so it can be private and callable from within.
- Index 2 : A GCP computing instance, we call it VM (Virtual Machine) and this is our “computer” or “server”.
- Index 3 : We will link our VM instance to the created Docker image (located in the Google Container Registry), so when the instance is launching it will load the container for the dockerized application.
- Index 4 : Our training dataset is in the cloud storage bucket. When loading the Docker image our script (
main.py) we'll load the training dataset using the GCP API used in Python. - Index 5 : After doing our training using the resources of our VM instance we’ll save our trained model in the cloud storage bucket.
You can adapt this architecture and the code that will follow to your needs and use case, what to get here is the general idea about how to dockerize your process and then put or pull data from your bucket.
Creating the main script
The script we’re presenting here is just a dummy one, we’ll do a learning using a Decision Tree on the iris species dataset, but the general idea is the same and it can be extended or adapted to your case. It consists of three parts :
- Loading the training dataset from the bucket.
- Doing the training and saving the model as a pickle inside the container.
- Write the pickled model to your bucket.
The two parts that interests us are the first and the third one.
How to load the data from the bucket
from google.cloud import storage


def load_train_data():
    storage_client = storage.Client()
    train_file = open("train_iris.csv", "wb")
    storage_client.download_blob_to_file("gs://iris_ml_bucket/iris.csv", train_file)
    train_file.close()
The storage.Client() is what makes the connection to our cloud storage, there is no need to give it credentials because it will run from our GCP ecosystem. The only thing we'll need is to run the container in a privileged mode (we will see this a bit further).
storage_client.download_blob_to_file save the training dataset inside our docker container and it takes two arguments, the first one is gs://iris_ml_bucket/iris.csv which indicates the training dataset path contained in the bucket, in your case it has to have the following form gs://<name-of-your-bucket>/path/to/file, and the second one is the file object, here named train_file, to write the dataset locally inside the container.
How to transfer the saved model from our container into the bucket
def save_model():
    storage_client = storage.Client()
    bucket = storage_client.get_bucket('iris_ml_bucket')
    blob = bucket.blob("trained_model.pkl")
    blob.upload_from_filename('model.pkl')
Here again storage.Client() makes the connection to our cloud storage. Then to select the specific bucket we use bucket = storage_client.get_bucket('iris_ml_bucket'), iris_ml_bucket is the name of the bucket. Put accordingly the right name for your own existing bucket.
blob = bucket.blob("trained_model.pkl") defines the "end point", in other terms we're saying to our code "we plan to create a file inside the bucket named *trained_model.pkl*".
Now that we’ve planned the where and what name to give to our future saved model, it is time to upload it by using blob.upload_from_filename and the argument it takes is the container local file path to the saved model.
In addition to the Python script, we’ll need its requirements in terms of packages. We’ll put both files inside a folder named app.
app
├── main.py
└── requirements.txt
Creating the Docker image and pushing it to the Google Container Registry
Create the Docker image
In case you need Docker references here is a cheat sheet I’ve made : https://github.com/aminelemaizi/cheat-sheets/blob/master/Docker-Cheat-Sheet.md.
We need to dockerize our process, for this the main step is to create our Dockerfile. Here the commented Dockerfile to explain each step :
# base image is an Ubuntu
FROM ubuntu:latest

# installing needed packages for pyhton
RUN apt update
RUN apt-get update -y
RUN apt-get install -y python3-pip python3-dev build-essential

# we will copy the app folder containing the script and requirements
COPY ./app /app

# this is like doing `cd /app` from the Docker image perspective
WORKDIR /app

# installing our python script requirements
RUN pip3 install -r requirements.txt

# executing the script
CMD ["python3", "main.py"]
What follows is the building of this image, named ml-iris:
docker build -t ml-iris .
Make sure the folder app is at the same level of our Dockerfile.
.
├── app
│ ├── main.py
│ └── requirements.txt
└── Dockerfile
Push the Docker image to Google Container Registry
Make sure you have the GCP client installed on your machine so you can use gcloud command. This link we'll show you how to proceed : Quickstart: Install the Google Cloud CLI | Google Cloud CLI Documentation.
To guarantee that our image is private, we’ll now try to push it to our Google Container Registry but first we have to make sure this service is activated.

Now let us prepare the Docker image with the right tag, for this you have to execute the following command:
docker tag ml-iris gcr.io/<gcp-project-id>/ml-iris
Your tag has to respect a certain layout which is grc.io/<gcp-project-id>/<image-name>, first grc.io indicates the Google Container Registry, then you have to put your used GCP project id and at last your Docker image name.
Now that the image has the right tag, we have to make sure that we’re authenticated from our own computer to our GCP account by running:
gcloud auth login
All what is remaining is just to push the Docker image to the Google Container Registry using :
gcloud docker -- push gcr.io/lems-odyssey/ml-iris
If everything is ok, you will see your Docker image showing up on your cloud registry, and as you can notice it bellow the visibility is as “Private” meaning nobody has access to our top secret machine learning script.

Creating a cloud storage bucket
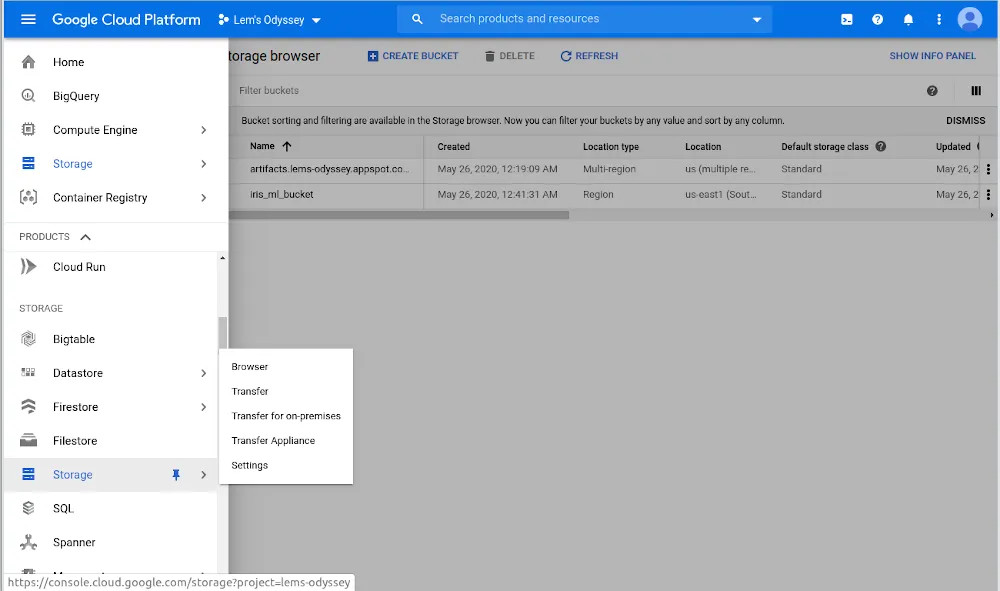
For creating a new bucket under GCP, you need to select on the left side menu the Storage option under the STORAGE segment.
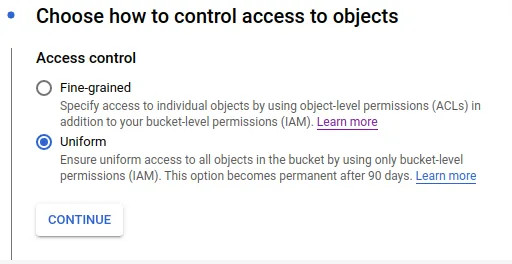
Choose a unique name for your bucket, and for the sake of the demo there is no need to change the other options, so if you have some specific use cases then change the storage options accordingly (like making sure having all your GCP products in the same zone region for reduced latency, for example). The only option to change for this demo is the Access Control, it has to be set to “Uniform” (no need in our demo to create a special access list).
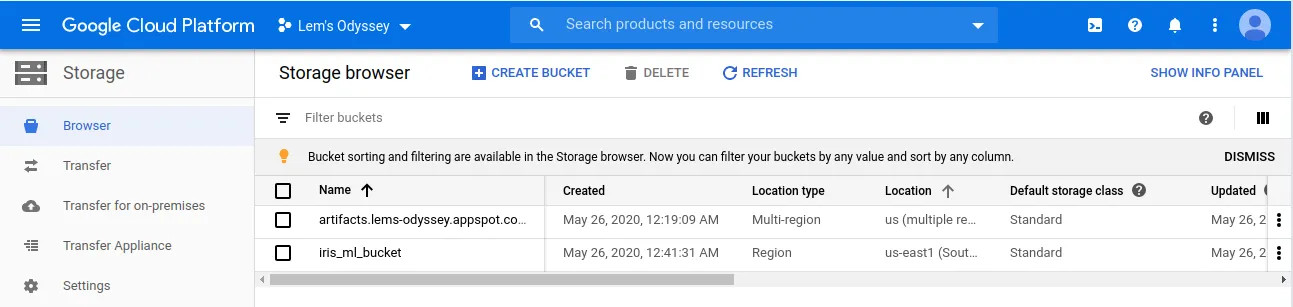
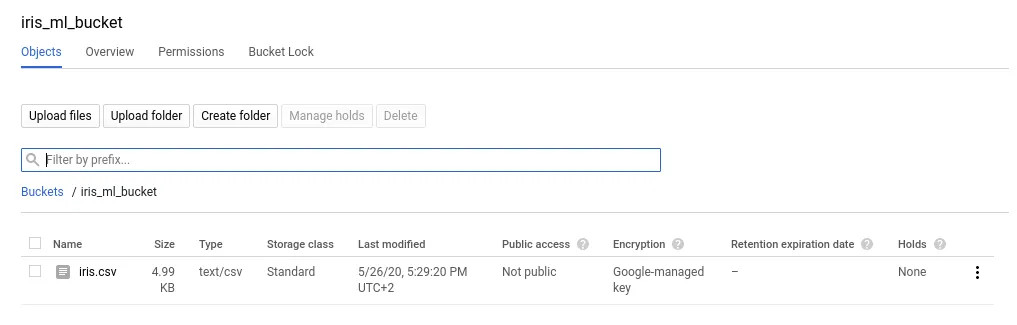
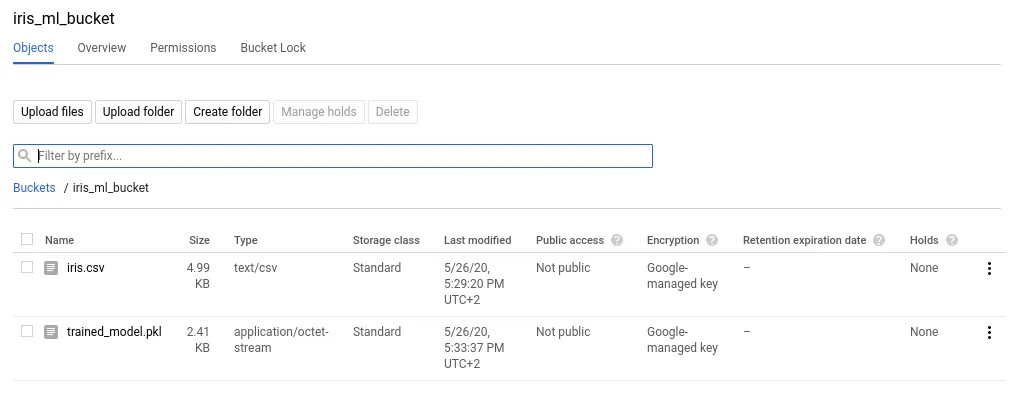
Make sure that the chosen bucket name is mentioned on your Docker Python script (main.py). As you can see here, the bucket I've created to store my iris machine learning dataset is displayed (iris_ml_bucket).
And don’t forget to upload your training dataset inside this newly created bucket (same name as mentioned inside the Python script).
Creating a VM instance linked to our Docker Image
Now it is the “core part”, creating the instance is in itself running the learning and saving the generated trained machine learning model. How ? the fact to choose a VM instance based on a Docker image will execute our main.py script when launching VM (i.e. launching the container). So after creating the Docker VM instance we just have to wait a bit to find on our linked bucket the trained model saved as a pickle.
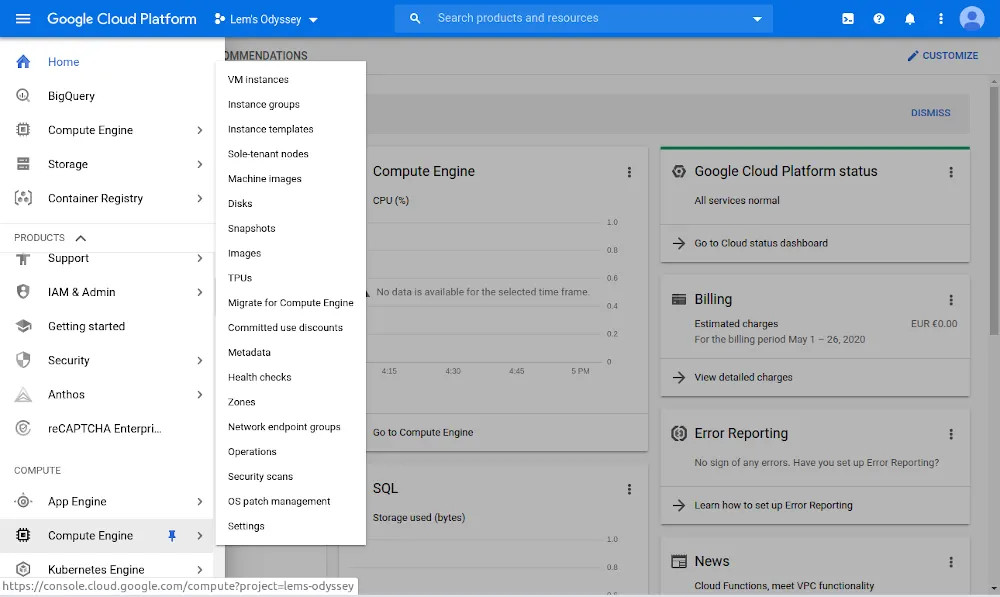
To create an instance you have to choose on the COMPUTE segment the option called Compute Engine.
Then choose to create a new VM instance, give it a meaningful name. For the sake of our demo we’ll be just interested on modifying the two important main options to make this work.
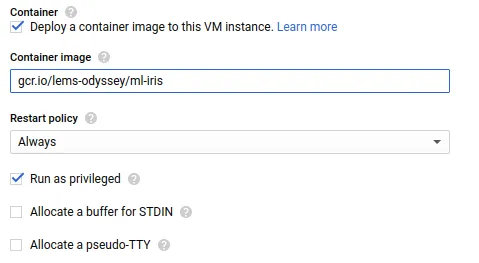
First, under the Container section check the Deploy a container image to this VM instance option and indicate the Docker image tag used for the Google Container Registry in the Container image field (in my case it’s gcr.io/lems-odyssey/ml-iris). After that click on Advanced container options and check the Run as privileged option, this way the container can communicate with the storage with no problem and write on it.
Secondly, in addition to run our container as privileged we need to give read and write access for our VM instance to the cloud storage. To do that, under the Identity and API access section of the VM instance creation and for the Access scopes sub-section choose the Set access for each API option.
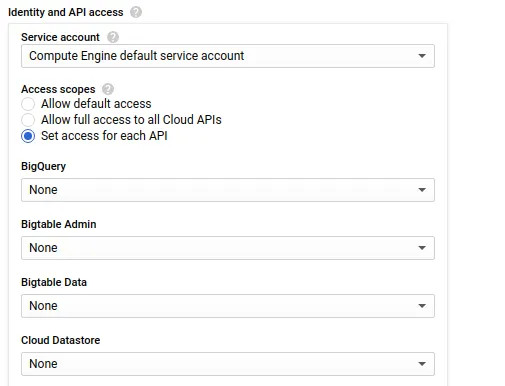
Go under until you find the option for Storage and then choose Read Write instead of the Read only.

Now all what is remaining is creating the instance and waiting a bit (even with a dummy example you have to wait like 3 to 4 minutes) and then go check the bucket. With this, we will found our trained model saved as a pickle file inside our bucket as you can see here (trained_model.pkl).
Can we do all this only in the shell with no graphical user interface ?
The answer is yes ! We can redo all this just from the comfort of our shell and we’ll see together the commands to achieve the same results.
First, make sure you have the same layout as this :
.
├── app
│ ├── main.py
│ └── requirements.txt
├── Dockerfile
└── iris.csv
And here is the shell script to use :
# We'll start by creating a new bucket, but first we need to authenticate
gcloud auth login

# Create a new bucket
# 'mb' means "make bucket"
# '-b on' to set the 'Uniform' option as seen before
# '-p' to specify the GCP project id we're working with
gsutil mb -b on -p <your-gcp-project-id> gs://<bucket-name>

# Upload the iris dataset
gsutil cp iris.csv gs://<bucket-name>

# Now we'll build our docker image locally
docker build -t <image-name> .

# We'll tag the image to push it to Google Container Registry
docker tag <image-name> gcr.io/<your-gcp-project-id>/<image-name>

# Pushing the image to GCR
gcloud docker -- push gcr.io/<your-gcp-project-id>/<image-name>

# Create a VM instance based on the image we've just created
# all the options seen in the GUI we'll be define here too
gcloud compute --project=<your-gcp-project-id> instances create-with-container <instance-name> \
    --container-image=gcr.io/<your-gcp-project-id>/<image-name> \
    --container-privileged \
    --scopes storage-rw \
    --zone us-central1-a

# Check the content of our bucket, to see if our model has been saved
gsutil ls gs://iris_ml_bucket

# Download the model locally
gsutil cp gs://<bucket-name>/trained_model.pkl trained_model.pkl
That's all folks! Don't hesitate to follow me on Twitter!